Wednesday, April 15, 2015
{Recipe} Balela
I have this love hate relationship with Costco. Just when I become dependent on a product they carry, they decide to discontinue it. That's how this recipe for Balela, or Mediterranean chickpea salad came about.
I bought a tub of this stuff to serve during Easter lunch and just loved it. It's high in protein and perfect for snacking. I went back this week to grab more and sure enough, they were all out.
Luckily, I still had the container from the original tub I bought so I just looked at the ingredient list. I didn't have everything in my pantry but I thought I'd give it a try anyway.
With a few modifications, my own recipe for chickpea salad was born. This is super easy and fast to make. It's a great alternative to chips and salsa or chips and dip. This is delicious with pita bread, pita chips or crackers as an appetizer. It is also great as a side dish to rotisserie chicken or mixed with some salad greens. I suggest letting it marinate for a couple hours so the flavors really blend together.
Balela ( Mediterranean chickpea salad)
1 can garbanzo beans, rinsed and drained
1/2 can black beans, rinsed and drained
1 1/2 cup extra virgin olive oil ( I used garlic infused olive oil)
1 cup cherry tomatoes, cut in halves
3 cloves of garlic, diced
1 teaspoon dried basil
1 teaspoon dried dill
1/2 teaspoon onion powder
1/2 teaspoon cayenne pepper
Juice of 1 lemon
Black pepper and kosher salt to taste
Directions:
Combine all the ingredients in a bowl. Allow to marinate for a couple hours or overnight. Serve with pita bread triangles.
Enjoy!
Labels:
recipe
Saturday, November 29, 2014
Christmas Tablescapes {Christmas Tea 2013}
This is a wonderful tradition at our church attended by almost a thousand women with men from our church serving as our butlers. Last year I decorated three tables for the tea, one table for my personal guests and two tables for guests of the church.
My first table was classic and traditional with a touch of whimsical. I used my beloved vintage glass snack plates and cups. The napkin rings are paper towel rolls covered in gift wrap.
For the centerpiece, I simply put ornaments from the dollar store in an apothecary jar. I added matching "peace" and "joy" plaques also from the dollar store.
I've had this "be merry" platter forever and it matched the table perfectly.
For favors, I wrapped up some hand cream. Everyone needs extra hand cream in the winter, right?
The inspiration for the second table I decorated came from these paper plates I bought on clearance back in 2012. I normally would stay away from using paper plates at the tea but these plates were so pretty.
The centerpiece for the table were pine cones in a cylinder vase with silver glitter branches
For favors, I picked up some hand soap at Bed, Bath and Beyond. The soap bottles were $1 each but I bought 15 bottles and used my $5 off coupon making them less than a buck each.
Oh the sweets! I made these chocolate cups and filled them with cream cheese frosting.
For my final table, I went with a sparkly blue and black theme. For centerpieces, I mixed some cone trees from the dollar store, Home Goods and glass trees I found at Costco
As I write this, I am prepping my supplies for this year's tea. I am wishing all of you a wonderful Christmas season filled with crafting, friends, laughter and the love of Jesus.
Friday, June 6, 2014
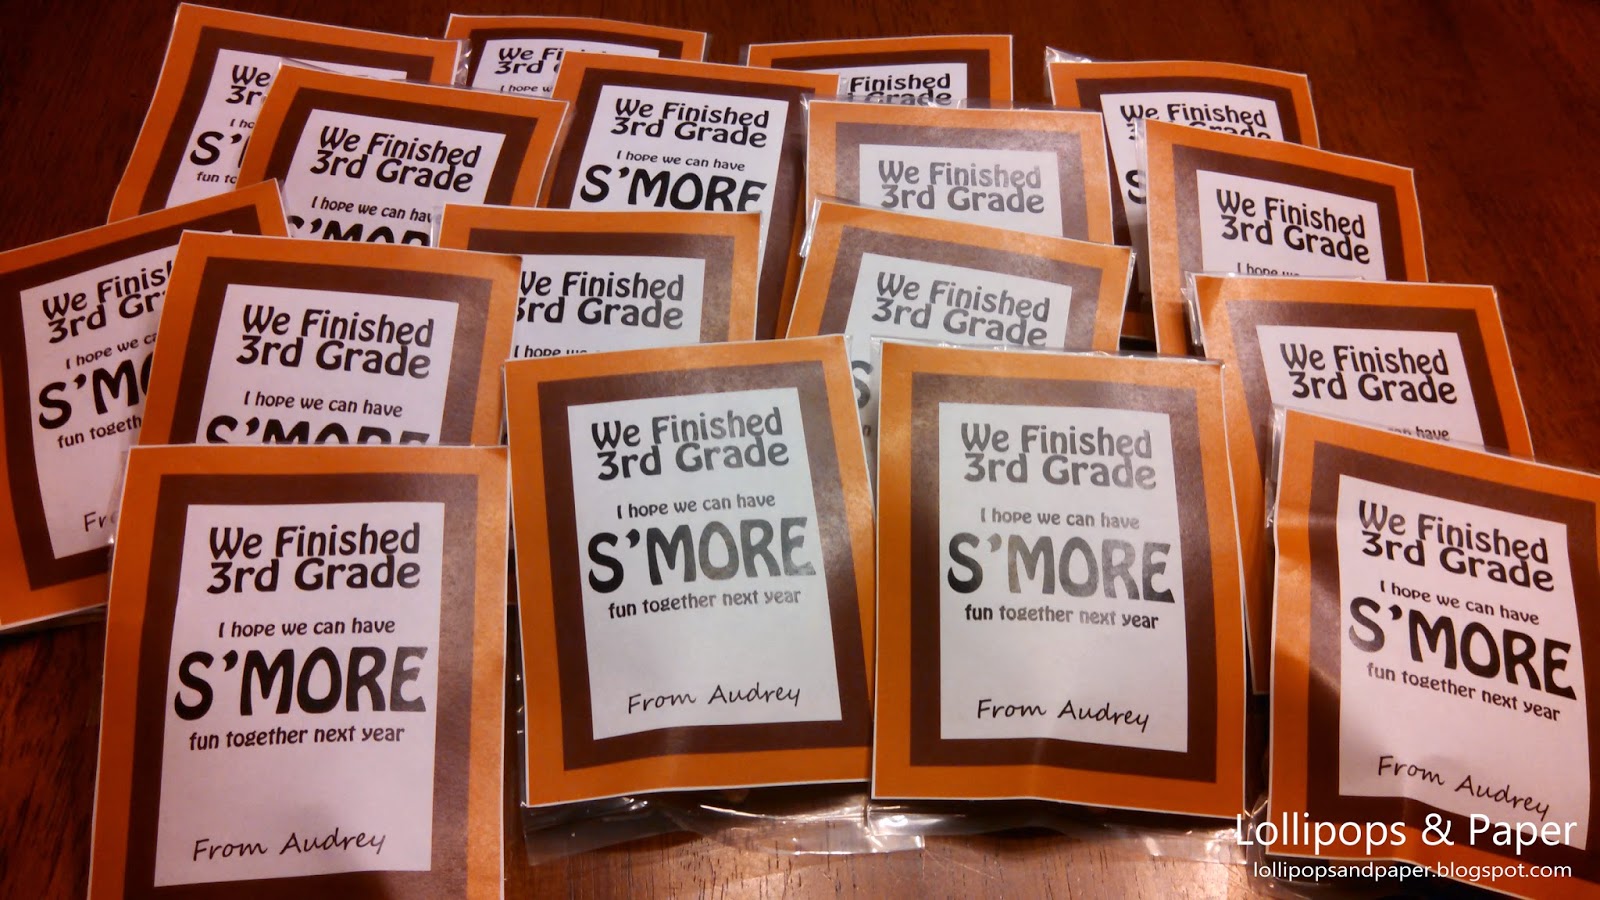
S'mores class favors
Anyhow, this reminded me that although I've been updating the facebook page, I haven't blogged in six months. So I'm going to try to get back into it and I'm starting with a revamp to my S'mores favors.
We first gave these out when my oldest daughter finished kindergarten. I blinked my eyes and here we are giving them to her THIRD GRADE class. My second grader is also giving them out to her class. We changed schools this year so I'm not technically recycling an idea-- these classmates of theirs have never received them so they're "new."
There are tons of s'mores flavored snacks out there. It was hard for me to decide which snack to choose.
I ended up going with Pop Tarts because the size of the package worked perfectly with the printable I designed. Here's the thing-- we've never bought Pop Tarts at our house. The box said 16 Pop Tarts so I bought 4 boxes thinking that would be enough for a total of 60 kids. Here's the thing I learned after opening two boxes-- each packet has two tarts. So one box only made 8 favors.
I had already opened the box so I went with it anyway.
For the remaining favors, I used Goldfish crackers because it came out cheaper than buying more Pop Tarts. I filled a 3x5 lollipops bag with approximately 1/4 cup of crackers and sealed them.
I think I like the Goldfish ones better since you can actually see the contents of the bag.
Subscribe to:
Comments (Atom)


